
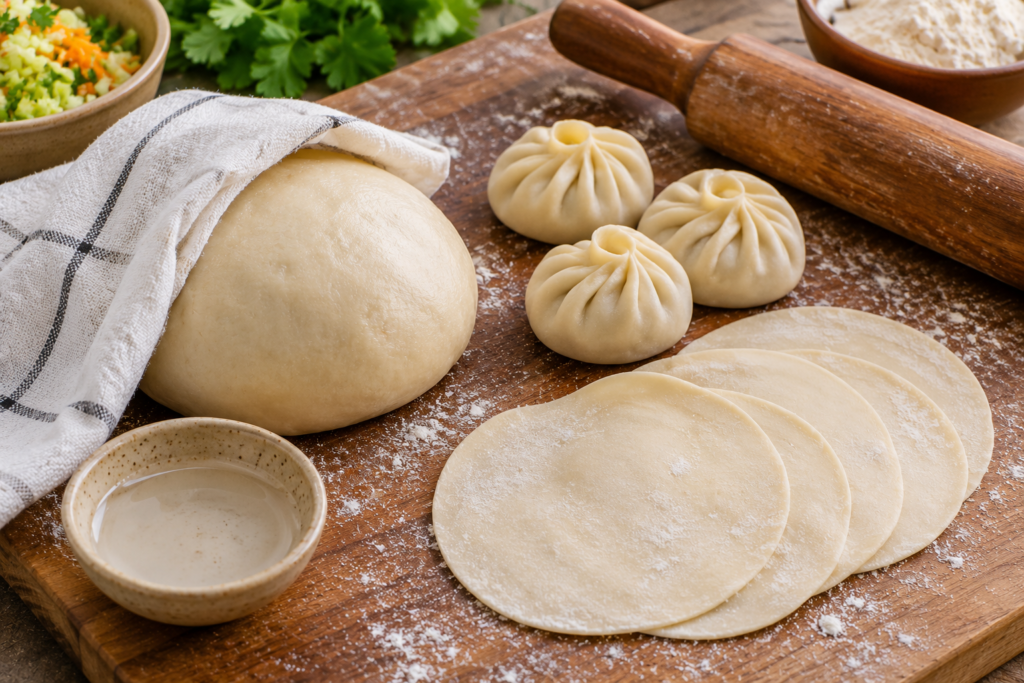
Do your momos turn hard, crack while pleating or shrink as you roll? The dough is often part of the problem. Making soft momo dough is less about adding excessive water and more about balancing flour and hydration, kneading until cohesive, resting the dough, rolling wrappers evenly and steaming only as long as needed.
Quick answer: For a starting trial, combine 200 g all-purpose flour with approximately 90–110 ml water and a little salt; mix until a firm yet pliable dough forms, knead until smooth, cover and rest about 20–30 minutes. Keep dough covered while shaping, roll the edges thinner than the centre and avoid thick pleated bottoms. These are adaptable home-cooking guidelines, not a Momo Crown kitchen-tested formulation.
Editorial transparency: This guide synthesizes published momo recipes and flour-dough handling principles. No Momo Crown kitchen test, expert endorsement, measured recipe yield or original step-by-step photography is claimed. The featured image is illustrative.
Soft Momo Dough: Quick Starting Formula
Yield: A small home batch of wrappers; actual count depends on diameter and thickness. Mixing and kneading: approximately 8–12 minutes as a guide. Rest: 20–30 minutes, covered. Total active and resting time: approximately 30–45 minutes, excluding filling and cooking.
| Ingredient | Starting amount | Purpose |
|---|---|---|
| All-purpose wheat flour (maida) | 200 g | Base flour for the wrapper |
| Water | Start with 90 ml; add gradually up to roughly 110 ml if needed | Hydrates flour so dough holds together |
| Salt | ¼ tsp (optional) | Seasoning |
| Neutral oil | 1 tsp (optional) | Handling preference; not essential to every momo recipe |
- Measure: Weigh flour if possible, and hold back some water.
- Mix: Add water gradually until all loose flour is absorbed; adjust by feel rather than pouring everything at once.
- Knead: Work the dough until it forms a cohesive, fairly smooth ball that is pliable without being sticky.
- Rest: Cover closely with a damp cloth or suitable lid for approximately 20–30 minutes.
- Portion and roll: Work with a few small pieces at a time. Keep unused dough covered and roll edges thinly with slightly more body at the centre.
Texture test: You should be able to flatten a small rested ball into an even disc without excessive cracking or snapping back. If not, refer to the troubleshooting table.
What Does “Soft Momo Dough” Actually Mean?
The goal is not a loose, sticky bread dough. For most thin steamed wheat wrappers, you want dough that can be rolled thin, stretched around filling and pleated without tearing. Too dry and the edges crack; too wet and wrappers stick to the board and seals are hard to control.
The ideal texture varies with flour protein, humidity, how much flour you use when rolling, and whether you are making steamed, pan-fried or wholewheat momos. Published recipes are not identical: Dassana’s veg momos recipe uses a firm yet soft dough and recommends a covered rest, while its wholewheat version describes a soft smooth dough rested around 30 minutes.
Important distinction: Dough that feels soft before cooking does not guarantee a tender finished momo. Wrapper thickness, drying during shaping and oversteaming affect the final bite.
Maida vs Atta: Which Flour Should You Use?
All-purpose flour (maida)
A common choice for smooth, stretchable wheat momo wrappers. It is often easier for beginners to roll into thin, uniform discs. It does contain gluten and is not suitable for people who must avoid wheat.
Wholewheat atta
Wholewheat flour contains bran and commonly absorbs water differently, so it may need additional hydration and resting. Wrappers may have a stronger wheat flavour and a different texture. The 200 g maida formula above should not be treated as an exact one-to-one wholewheat conversion.
Mixed maida and atta
A blend can change flavour and handling, but the outcome depends on flour characteristics. For beginners, learn with one flour first, then make small batches when experimenting with blends.
Is millet flour a direct substitute?
No. Many millet flours do not form the same gluten network as wheat flour. Replacing wheat entirely can produce a dough that cracks or requires a different binder or technique. A millet momo needs its own tested formula. Also, simply using some millet does not make a wheat-containing momo gluten-free.
Step-by-Step: Mix and Knead Dough for Momo Wrappers
Step 1 — Add water a little at a time
Place the flour and optional salt in a bowl. Add most of the starting water gradually and stir until the mixture looks shaggy. Squeeze a handful: it should begin holding together. If dry flour remains after mixing, add water in small increments. Measuring flour by weight is more reliable than tightly packed cups.
Step 2 — Bring the shaggy flour together
Turn the mixture onto a clean surface. Press and fold until a ball forms. It may look rough initially. Resist adding too much dry flour as soon as it feels slightly tacky; kneading often improves the surface.
Step 3 — Knead to a smooth, manageable consistency
Knead by pushing the dough forward with the heel of your palm, folding it back and rotating. A practical sign is a mostly smooth ball with no dry, crumbly patches. The aim is cohesion and extensibility, not exhausting the dough. If it tears immediately, give it a short covered rest and reassess.
Step 4 — Rest covered for about 20–30 minutes
Place the dough in a bowl and cover it closely so the surface does not form a skin. Resting lets water distribute and the gluten network relax, making rolling easier. The basic principle is also discussed by King Arthur Baking’s explanation of dough snapping back. It describes bread/pizza dough rather than momos, so use it as an explanation of dough mechanics, not as a momo-specific timing study.
Step 5 — Portion, cover and roll
Divide into small pieces of similar size, keep the rest covered and roll each piece from the centre outward. Aim for a thin edge that folds readily without tearing. A little more thickness in the centre can help support filling, but a very thick base or pleat cluster takes longer to cook.
Step 6 — Fill and seal without drying out
Use a filling that is not excessively wet, and avoid overfilling. Pinch pleats firmly together. If the wrapper has dried, it may resist sealing; keep working portions covered and consider lightly moistening a dry edge, but too much water can make the seam slippery.
How Thin Should a Momo Wrapper Be?
There is no one compulsory millimetre value for every momo style. Thin, even edges are easier to fold; the middle may be slightly thicker to hold the weight of the filling. If wrappers tear instantly, they may be too thin or insufficiently rested. If the finished momos feel doughy or the pleated crown remains raw, they may be too thick.
Rather than chasing one exact measurement without experience, try a small test batch and cut one steamed momo open to inspect the thicker seam. This guide does not pretend that a particular thickness has been verified in Momo Crown’s kitchen.
Momo Dough Troubleshooting: What Went Wrong?
| Problem | Likely reason | Practical adjustment |
|---|---|---|
| Dough cracks while rolling | Too little water, insufficient rest or surface drying | Knead in a few drops of water if dry, cover and rest longer |
| Disc shrinks back after rolling | Dough is still tight | Cover and give it another short rest instead of forcing it |
| Dough sticks heavily to hands or board | Excess hydration or little dusting control | Rest briefly and use a modest flour dusting; correct a genuinely wet dough with a little flour |
| Edges tear when pleated | Wrapper too thin or uneven; filling overpacked | Roll more evenly and use less filling |
| Seam does not hold | Dry edges, too much filling or over-dusting | Keep wrappers covered, brush off excess flour and pinch firmly |
| Steamed momo turns chewy | Thick wrapper, prolonged steaming or dry handling | Roll thinner and check cooking time based on the filling |
| Momo bottom remains doughy | Heavy centre/pleats or incomplete steaming | Make the base thinner, improve steam circulation and check doneness |
Why Momos Become Hard After Steaming
Sometimes the dough is fine but cooking causes the trouble. Wrappers that are thicker than necessary can develop a dense bite, while prolonged steaming may dry or toughen the surface. Make sure steam circulates, avoid crowding, and check a sample dumpling rather than relying on a universal minute count.
For a kadai or idli-stand technique, consult our how to steam momos without a steamer guide once the companion article is published. For raw poultry filling, verify a centre temperature of 74°C (165°F) with a food thermometer rather than shortening the cooking time merely to protect wrapper texture.
How to Keep Dough and Wrappers from Drying Out
While preparing a batch, cover the main dough ball and unused pieces so the surface stays supple. Roll and fill a manageable number at a time. A film of dry flour on exposed wrapper edges can make pleating harder. Where possible, shape just before steaming or prepare a well-planned freezing batch, rather than leaving filled raw momos on the counter.
For perishable raw fillings, follow proper food-handling practices: refrigerate at 4°C or below and do not leave them out more than two hours (one hour in temperatures above 32°C). The FoodSafety.gov guide explains these limits. See our planned guide to freezing uncooked momos for longer storage.
Frequently Asked Questions
Should momo dough be hard or soft?
It should be reasonably firm yet pliable: flexible enough for thin rolling and pleating, but not loose or sticky like a batter.
Does momo dough need yeast or baking powder?
Classic steamed wheat momo wrappers are generally unleavened. The basic recipe here uses flour, water and optional salt or oil—not yeast.
Can I use warm water for momo dough?
Some cooks use room-temperature water and others use warm water; the result depends on flour and handling. For the starting formula in this guide, room-temperature water is sufficient. Do not add dangerously hot water without a specific tested method.
Can I knead momo dough in a mixer?
Potentially, if your mixer handles firm dough and you follow its capacity limits. Check the dough by feel; overloading a machine or adding excess water to make it turn can create new problems.
Is the exact 200 g-to-100 ml ratio guaranteed?
No. It is a useful starting point, not an independently tested Momo Crown formula. Adjust water as flour absorbs it and judge the rested dough’s pliability.
Can I substitute atta for maida in the same amount?
Use equal weight only as a starting point. The water requirement and texture may change, so expect to adjust by feel. Refer to a wholewheat-specific momo recipe for a validated approach.
What should I serve with my momos?
A tomato and chilli dip pairs naturally with steamed vegetable momos. For a no-onion-no-garlic option, see our garlic-free momo chutney recipe when it is published. The Momo Crown menu also illustrates different momo fillings and styles.